Mark this down on your to-do list for tomorrow!!!!
On July 1st, call me between 9 am and 9 pm (Central Time) and place an order and look what you can get!!!!
- The first caller automatically gets 1 FREE Classic Ink Pad of their choice
- ALL callers get 1 entry into a drawing for every increment of $50 that they spend for a $10 gift certificate to add on to their order (ie. spend $0-$50 and you get 1 entry, $51-$100 2 entries, $101-$150 3 entries, and so on)
- If you order $100 in items, you get free shipping on your order (plus the above mentioned entries into the drawing and any other applicable prizes)
- If you order $150 in items you get all the above mentioned applicable items PLUS $15 in SU! merchandise and one Level I hostess set (and so on for hostess benefits after $150 minimum is ordered)
- If you get a group order together (people NOT on my mailing list is even better but not necessary - you bring orders to me and you benefit!!) and you get whatever hostess benefits apply, all of the applicable items above, AND a FREE STAMP SET/ITEM valued at $20 or less (total group order must be a minimum of $150)
- If you get someone to place an order who is NOT on my mailing list you get a FREE Classic ink pad of your choice
I will only be able to accept credit/debit cards for this promotion.
Hopefully it all sounds good to you. I'm doing this promotion in honor of the Fourth of July, but want everyone to be able to enjoy the 4th without having to rush to the phone.
If I don't answer my phone, I'm probably taking an order, so leave your name and number and I will return your call.
*****If you are abroad and can't call (I have several over-seas friends who remained customers with their moves) just shoot me an e-mail during the hours of the promotion. You will still get any goodies applicable based on the time stamp on your e-mail.
To get my phone number you will need to shoot me an e-mail prior to the 1st or leave a comment here (with your e-mail available in the post or in your profile) and I will give it to you. I don't really want to post it for possible spammers to see. Hope you understand. Thanks!
June 30, 2008
Marie's Phone-a-Thon
June 29, 2008
Last Sneak Peek for GBC July Kit
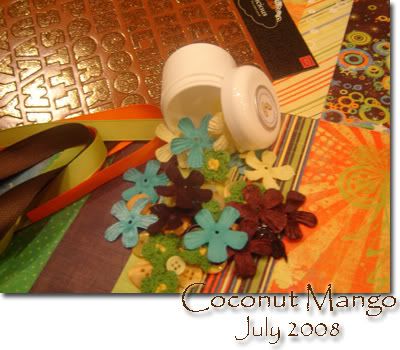
I had this post scheduled so that I didn't have to actually sit down and spend time away from my family on Sunday, and hopefully it intrigues you. :) I went a little circle crazy on this, my last Sneak Peek before the big reveal of all of my projects (that I can show you on the 1st) using the July "Coconut Mango" Scrapbook Kit featuring Fancy Pants papers available at Go. Be Creative. Don't forget to play in my scavenger hunt to win an entire kit for free (have to post before I draw the winner on July 1st - see the sticky for more details)!!! It's valued at $30+ and is a really nice kit. I LOVE the artsy.licious letters and used them on both scrapbook pages and cards. They are too cute!!! Anyway. Hope you like the peek and stay tuned for the reveal and the drawing of the winner of the kit on July 1st!
Paper: Core'dinations CS in Orange and Blue Lightning, Fancy Pants "About a Boy" paper in "chillin'"
Accessories visible in this "peek": Paper piercing tool
June 28, 2008
Best of Luck...Verve meets gel-à-tins
 So, I ordered some fun embossing powders in assorted blues and a green and also my very first stamp set from gel-à-tins and I am LOVING the stamps! I haven't gotten to use the ep's yet. When I saw the set I got (wild things) on their website I had this idea immediately for the dandelion image. I love dandelions and both of my girls do - especially my DD#2. She adores them and will go miles to pick one and blow it if she sees one. Anyway, I wanted to keep the card simple, so hopefully it achieved this while still looking spectacular. I really like it. I didn't have White craft ink (it's in storage...)so I used white StazOn and it didn't work as well as I would have hoped. I then lightly chalked some green, brown and blue onto the images. The blue is lightly dusted on the butterfly and I think you can figure out where the green and brown are. Anyway, I hope you like it - would love to know what you think!
Stamps: wild things (gel-à-tins) and sentiment from Great Expectations (Verve Visual)
Paper: Kraft CS
Ink: White StazOn
Accessories: White organdy ribbon, Pastels
Have a great weekend!!!
PS - Does anyone know how to omit the extra line-spacing like you see above in my "recipe" in TypePad? I can't figure it out. Thanks!!
June 27, 2008
I am GOING to stamp tomorrow, but....
First, this is me asking each of you a favor. If you have me listed in your blogrolls, would you please make sure that you have changed my blog address to this one at TypePad. It's the same exact address except where "blogspot" used to be, you should now insert "typepad". I really appreciate it. I would like to confuse people as little as possible :)
Tomorrow I get to stamp. Not because anyone is going to help make that happen - the DH has to work all day because they're behind in flying at the base - but because no matter what, when Daniel takes his nap instead of cleaning as I usually do, I'm going to finish at least one card. That's my goal. I know the girls will be distracting, so one card will be enough without the DH home to play with the girls and keep them out of my hair. I don't like to do the TV babysitting thing - I do that when I HAVE to, but stamping really isn't a HAVE to - and I really feel like the 2 shows (1 hr) they get in the morning around breakfast time is PLENTY! I have seen what happens when they're allowed to watch a lot of tv - they get nasty to each other and us, they get whiny, and basically are not fun to be around. I would rather have them outside at the playground or doing activities with me like reading and coloring. So, anyway, TMI, right?
All you need/want to know is that I will be posting a card tomorrow and I hope it goes smoothly. I've never posted a pic on TypePad yet - as I only "moved" here 2 days ago :)
I hope you all have a great weekend!!!
June 25, 2008
I Am LIVE on TypePad!!!
First of all, this is my test to see if my subscribers get notification of my new blog address. There is more info I need to know that you'll see below, but if you are a subscriber would you please let me know if you get this update in the comments. Thanks so much!!!
All -please bear with me as I re-configure my sidebar. If you used to be in it (or if you weren't and would like to be in my blog roll) PLEASE let me know if you don't see your name. It's hard to remember the 100+ links that I had. I was thinking of cutting down, but that's no fun, is it?!!? Please don't be offended if I forget your name, I would love a reminder here in the comments.
DON'T FORGET TO ENTER MY BOOT LOOT CONTEST!!! I would love to actually have to use the random integer generator for a random number chose from LOTS of integers :) It is in the post below this one, or just click here.
Please update my blog address in your blogrolls if I'm in them, please ;)
Scavenger Hunt - Boot Loot Drawing on July 1st!!
 This post will be kept as a sticky at the top so no one misses it. Don't be intimidated...it will only take about 10 min or less to play!!!
So, I'm going to have a little scavenger hunt to give away some BOOT LOOT!!! I love the 4th of July. The barbecue, the fireworks, time spent with family and friends, and most importantly, the reason for the celebration. It's a really wonderful holiday, and having served in the AF and still being a military family, it has extra special meaning.
June 24, 2008
I finally got one....
A Janome Sew Mini, that is. Hancock Fabrics had them on sale for $49.99 and I thought that that was a decent deal and I think I got free shipping because it was my first purchase from them, so I was happy. I FINALLY used it - but it's on one of the projects I can't show you in its entirety. I can, however, show you a little peek. If you check out the July Kit at Go. Be Creative. you'll see what I used to make this layout. I even used something from the kit that wasn't intended for use, but I love to get creative with things. In July I'll be able to explain ;) Enjoy this peek! I'm hoping to actually get to stamp a card (and maybe even sew on it!) VERY soon!!
June 23, 2008
Another Sneak Peek....
So, if you read my last post, you'll see that these sneak peeks are important because they're created with the kit that I will be giving away as my next Boot Loot!!!! More details to follow in the coming days. Here is another sneak peek for ya though. :) These projects are created with GBC's July Kit. See the Coconut Mango kit here. Have a great night!
Busy, busy....
I have some projects I'm working on that I can't talk about at all, I have some projects I'm working on that I can't show you until July for Go. Be Creative., I have 30+ WOW swap cards (FULL CARDS) to make before July 18th, and I have SU! convention swaps to make if I want to swap at all, along with a VERY nice gift to make for someone also before July 18th. Add in that my kids have swimming lessons every day, I will be moving shortly after July 18th and have to get ready for that, and I have all the other normal things we moms/wives/AF families have to do, and I'm just a tad busy right now. I do have things done that I've completed, but as I mentioned, regretfully I won't be able to show them to you for a while.
Just make sure you use Feedblitz (or some other subscription method) so that you aren't checking back in here when I haven't updated.
I do feel guilty whenever I don't post, so don't worry that I will go too long with out posting something. I'll color a picture for you if I have to! ;)
Don't lose faith in me - I've got lots up my sleeves for July....to include a FREE monthly kit from GBC as Boot Loot that I'll be giving away on the 1st of July. Ooops, did I tell you that?!!? I was going to wait!!!
Have a great night!!!
June 21, 2008
Another sneak peek....

Here's another sneak peek of a project I made for my Design Team work for Go. Be Creative. using the July Kit. Go. here to check it out!!! It is well worth the $34 (approx. - depends on which kit membership you choose) for the great Fancy Pants papers and all the other stuff. To see an in depth list of all of the items available check out this post. There are also some great add-ons that you can see here. I got all of them. :)
June 20, 2008
SC181 AND WT171
If I had bothered to look at the Ways to Use it challenge over at Splitcoast yesterday, I would have found that two of my four cards qualified as they both have ric rac on them. Doh!! (Summoning Homer here...)
As I mentioned, the stamp set and the paper piercing is what differentiates the cards. Two use one stamp and two use another and they all have different paper piercing. It made for a quick set of cards.
Thanks for participating in my poll!
So, without further ado, here are the remaining two cards edited with Photoshop in YOUR preferred method (and no wonky shadows!) :)

Check THIS post for more info on where to get the items I used to make the cards and to see the sketch diagram for SC181.
Stamps: Heartfelt Phrases by Verve Visual
Paper: Fancy Pants "Fairytale" from GBC, Kraft and Whisper White
Ink: Basic Black Classic ink
Accessories: Black grosgrain (SU!) and black ric-rac (GBC), paper piercing tool and guide
June 19, 2008
SC181 and a Poll....
I would like you to take a look at my two cards for today (I made four total and will show you the other two tomorrow after I edit them the way most of you prefer). I edited the first one and removed a color cast that was on the card from the lighting in my house. I had crappy lighting today, not any good natural light, and so there is a slight yellow-ish cast to the photo (and some REALLY wonky shadows - but it makes you realize how I did the ribbon on that 2nd card!! ;) ). I touched it up in every other way except removing the color cast. In the 2nd picture, I did all the same edits but additionally I removed the color cast from the light. Which one is more appealing? I can't quite answer that question myself. The color cast makes the card have a little more "warmth" but it doesn't show the true brightness of SU!'s Whisper White CS. Anyway, I would LOVE to know what you think - that's why I have a blog, duh! So, vote in my poll so that I can post the remaining two cards tomorrow night.
Picture #1 
Picture #2 
 For SC181 we were to use the sketch layout you see to the left. I love this sketch of Kristina's. She is super talented and her style is one that I would love to call my own. I needed some quick cards and this sketch is perfect for that. Quick and simple, but stunning. I used some scraps of that Fancy Pants Fairytale paper I had left from my order over at Go. Be Creative. It's only 40 cents a sheet!! I LOVE this paper!!! I added a little paper piercing to each card and changed up the ribbon. The ric-rac is also from GBC. You can get it here. The paper piercing is different on all four cards I made, but you will see that the other 2 cards are really only different in that and the stamp set used. Anyway, I would love to hear what you think in my poll and as a comment here. Take care!
Stamps: Bitty Birthday
Paper: Fancy Pants "Fairytale" from GBC, Kraft and Whisper White CS
Ink: Basic Black Classic ink
Accessories: Black grosgrain (SU!) and black ric-rac (GBC), paper piercing tool and guide
Sneak Peek....

June 18, 2008
Go. Be Creative. July Kit is ALMOST HERE!!!
Welcome Baby Mini Album
 I purchased a class planner from Andrea Walford on making a Family Treasures Mini Album and I modified it to fit my own needs in making this baby album for a friend who recently had a little boy - he is her 2nd child. I hope that she likes it. I included a close-up of all the textures that are on the cover. On the card stock stickers that extend into the space where a photo goes (you'll see what I'm talking about in the photos below), I left half of the backing on the sticker. This way the sticker is in place where I want it but my friend can put her picture on the matte and then remove the backing and stick the sticker down the rest of the way.
For info on purchasing the album class planner from Andrea, click on her name above. She has some OUTSTANDING classes by e-mail and demonstrator class planners.
I plan on offering this mini album as a class to my customers once I live in my own house again, and I will let them pick whichever Simply Scrappin' Kit they would like to make their album to showcase the event/people/occasion that they want.
If you are my customer and want to go ahead and get this album and tutorial and make it on your own, e-mail me and I will take your order so you can get the items ASAP.
PS - I will be changing the white o-wire binding to larger ones, but for photographic purposes I used the only ones I had which are MUCH too small.
The pictures are in order from the cover through to the end of the book. Enjoy!


 ETA - Well, I got to looking at the last two pages, and just couldn't leave them be. I had to add one more thing to each of them. So, these two photos are what the last two pages look like now, and the book has been taken apart to await the arrival of some 1" o-wire binding (still white).

Stamps: NONE!!!
Paper: Special Delivery Boy Simply Scrappin' Kit
Ink: NONE!!!
Accessories: On Board Chipboard Book Basics (small) for font and back cover, Stylized Silver Hodge Podge Hardware (2008 Occasions Mini Catalog - available through 30 June '08), Wild Wasabi Double-Stitched ribbon, River Rock Double-Stitched ribbon, dimensionals, mini glue dots, bind-it-all, white 3/8" o-wire (will be using 1" to replace 3/8")
June 16, 2008
Super Simple Frame

 So, I got time to post earlier than I thought. I made this frame pretty simple because I didn't have much time on my hands to craft today, but I loved the papers I got from Go. Be Creative. and really wanted to play with them and the small wooden letters I got there. You can get the patterned Fancy Pants petterned paper here, and the wooden letters here. You will love them! I left mine natural but they can be painted or covered with paper.
The lighting in my house made the patterned paper a little more pink than it is, and I couldn't get Photoshop to make it correct without messing up the other colors. I made a simple bow for the corner, modpodged my paper on, and added some brown ric-rac. The ribbon and ric-rac were from an assortment of ribbon that I got for just over A BUCK! Check it out here. The Bazzill CS I used was not on sale, but it was only a quarter a sheet and you can get the Haley color I used here.
GBC is having a sale right now and ALL of the items I used for this project were marked down except the Bazzill CS. Don't miss out on their 50% off sale!!!
The frame I altered is from Wal-Mart (only store in this town with anything craft-related) and is made by EK Success. I prefer wooden ones, but oh well, you make do with what you've got! :)
Public Service Announcement
I will be posting lots of pics in the upcoming days, and hope to get one on today of a really simple but gorgeous altered frame that I am making. I have swap cards to share with you and the frame using my Go. Be Creative. papers/embellishments. BUT, right now I've got 30+ WOW swap cards to get started on, along with a gift I need to make, so my posts will probably be occurring in evenings now. Plus, we have lots of long-distance dealings to do with our house that we have for sale in Texas right now that take up a lot of my day. Take care, and check back late tonight!
June 15, 2008
Happy Father's Day!
Well, now that we're done doing Father's day things with my own husband, and I got the chance to call my own dad after church, I just want to say happy Father's Day to all the dads out there. Most especially to my own wonderful husband and my dad. I love you both and am so blessed to have each of you. Happy Father's Day!!!!
Quick Note - SU! Retiring Stamps list is HERE!!
 Here is a link to the list of retiring SU! stamp sets. You can view them listed alphabetically or by page number in the catty. When they're gone, they're GONE, unless you want to pay a pretty penny on eBay!!! Check them out and place your order by or before August 10th!
June 14, 2008
Mojo Monday Week #41

 It's a bit into the week and past Monday, but I've been itching to use my new Verve Visual stamp set Petals & Stems and as soon as I saw Julee's sketch this week (see it to the right) I saved it so I could use it. I hope you like this, I had fun making it and it took a while to cut out those little flowers and to do the paper piercing. I would love to hear what you think!
 Stamps: Petals & Stems and Fluttering By by Verve Visual
Paper: Almost Amethyst, Basic Black and Whisper White CS, Almost Amethyst Prints Designer Series Paper
Ink: Basic Black
Accessories: Pearl Dew Drops, Paper Piercing Tool and Template, Black grosgrain, dimensionals
June 13, 2008
Last of the Chickies...

...for now, anyway! I am so excited. I ordered some goodies from Go. Be Creative. (GBC) and I'm assuming they'll be here today since they hit Oklahoma City yesterday at some point. I can't wait to play with my new stuff!!! But, the card above is my last Chickie card for now. As you might notice, I added in more capital letters because I really didn't like just the "E" that I had to use from the little "e" stamp walking away. We STILL haven't found it, by the way. Anyway, I also wanted to change the sentiment a little bit to go with the scene I created. I did one of those "I should have quit while I was ahead" type of things. I was done with the card and then though, "oh, I should round my corners!" Well, bad mistake because when I had matted the Old Olive Prints paper I hadn't done it with the intent of rounding the corners so the card looks a bit wonky on the left-hand bottom side. Oh well, I should have stopped the second I asked myself if I should add more!!! Also, I had to draw the question mark myself - there wasn't one in the stamp set. I would love to hear what you think. I haven't heard from many people lately and you're starting to make me feel un-validated! I girl's gotta get her comments for the day!!! ;)
We've finally got some hope on the selling-our-house front. It has been on the market since January and we've signed a contract with a buyer and the house inspection is tomorrow and assuming all goes well and it appraises for at least as much as was offered, we're good to go! We're not buying another house as long as we're in the military unless we're retiring in it!!! Lesson learned the hard way!!!
Anyway, I hope you all have a great weekend!!
Stamps: Chick (D-02), Pot (C-55), Tall Grass (B-73), Low Grass (C-32), bird track (didn't have a number on it) - all "Stamps by Judith", Rough Edges Mini Alphabets
Paper: Chocolate Chip and Old Olive CS, Old Olive Prints DSP, Watercolor Paper
Ink: Basic Black, Really Rust, Old Olive, Summer Sun, Pumpkin Pie, and Bordering Blue Classic Inks
Accessories: Aqua Painter, Chocolate Chip Poly-Twill ribbon and Stylized Silver HPH Flower ribbon slide (both in 2008 Occasions Mini Catalog), corner rounder punch (with guide removed to make scallops)
June 11, 2008
More of the Chickie Story

So, this card was the second one that I made in my Chickie trilogy. It was when the whole problem occurred. I got up from the table after finishing the first card (previous post) to say prayers with the girls and tuck them into bed. Well, after I'd assembled this card and was ready to stamp the "Hi chickie!" I found that by the time I got to the "e" it was nowhere to be found. We looked EVERYWHERE. Logically, it wasn't me who lost it. The last stamp I would have been holding had I gotten up with the stamp in hand after making the previous card would have been the exclamation mark. But no, that one wasn't missing, the "e" was. Well, the OCD in me spent a good 30 minutes looking all over our tiny 2-bedroom apartment and never found it (we STILL haven't!!) and I was not happy. The DH suggested I just use the "E" in the set, so I did, but I didn't want to mount it on a block only to (hopefully) find the other "e" later. This set has both capital and lower-case letters mounted on one block. Anyway, so as you can see, it says "Hi chickiE!" now instead. I think it looks okay still, but as you'll see on the 3rd card in the trilogy, I just wasn't THAT fond of the "E" in the sentiment. Change is good though, I guess, as long as I find my missing stamp!!! I sure feel like a kid again watercoloring these images that I create. I must say that I really like creating scenes and I am disappointed that SU! doesn't have any stamp sets that you can do this with other than creating little people with All in the Family. If I wanted to stamp one of their line-art images and then draw a scene around it, I would be set, but I don't want to draw, I want to stamp! KWIM?
Oh, and have you checked out Go. Be Creative. yet? They have a great store and I promise you that the July and August kits are AWESOME!!!! You can ensure you get them by signing up to get the kits, or you can take a gamble that there are any left by buying them after they come out. I'm super excited to get mine and to play with it. You'll be seeing LOTS of projects with my kit items as soon as I'm able to show them to you. Of course, the best place to see them is at Go. Be Creative. There is a gallery, a store, and Message Board (forums like SCS - you'll need to register to get a user name). Check them out!!
Stamps: Chick (D-02), Pot (C-55), Tall Grass (B-73), Low Grass (C-32), bird track (didn't have a number on it) - all "Stamps by Judith", Rough Edges Mini Alphabets
Paper: Chocolate Chip and Old Olive CS, Old Olive Prints DSP, Watercolor Paper
Ink: Basic Black, Really Rust, Old Olive, Summer Sun, Pumpkin Pie, and Bordering Blue Classic Inks
Accessories: Aqua Painter, Chocolate Chip Poly-Twill ribbon (in 2008 Occasions Mini Catalog), corner rounder punch (with guide removed to make scallops), piercing tool and template
June 9, 2008
Exciting News!!!!
I am SO excited to tell you that I have been chosen to be a part of a really great team! It's the Creative Team for Go. Be Creative. The founder/creator, Lainey, is incredibly talented and chooses only the best items to go in the kits. Check out Go. Be Creative. and Lainey's blog by clicking on the names above. You won't regret it and I hope to see you in the forums of Go. Be Creative. soon!!! The other CT member is Annette and the CT Coordinator is Tam. You can see their blogs by clicking on their names. It's a great place to scrap, share, and make friends!!!! I am honored to be a part of Go. Be Creative. Since I couldn't describe it any better, straight off their website is the description of what they are about that you will find below. Go check them out!!!!
"Go. Be Creative. started off as a belief that it was possible to create a business where our customers could expect more than just some paper and stamps and buttons wrapped in a fancy box; that they deserved more than just a hodge-podge of supplies thrown together with no real thought or consideration. We wanted to create a kit that matched your inner spirit and let your imagination run wild.
So, at Go. Be Creative. we have committed ourselves to bringing you the finest scrapbooking supplies each and every month. While it's true that we do need to make some money to stay in business, that is not our driving force. Unlike many other kit clubs, our first and most important commitment remains to the art, to the memories, and to you.
At Go. Be Creative. we strive to bring you the very latest materials from wherever we may find them. Rather than go to the same companies that all of the other kits go to we want to see new and innovative companies succeed, and we are committed to doing whatever it takes to help them. In that spirit we are debuting our kit club with a brand new paper company. Likewise, if you have an idea or a product and don't know where to go, let us know. We would love to bring everyone along in our success.
Finally, and most importantly, Go. Be Creative. is committed to your satisfaction! We want you to be happy, to live and love life's greatest moments. That is why we need to hear from you. We will do whatever it takes to make you satisfied even if that means helping you find a club that better suits your needs. Because ultimately, we exist to make the world a better and happier place one layout at a time!"
Hi Chickie!

 So, I have a little story to go along with the three cards I made using these stamps the other day. I will start with the first card. Not much interesting with it to tell you (the story begins with the next card, I'll show you tomorrow) with this one. I'm making these cards to send to friends that I left at our last base because I know that (at least one of them) keeps every card I give her and you gotta love recipients like that!!! ;) Anyway, I just thought I would make some "hi chickie" cards using these cute stamps from Stamps by Judith. I am having fun improving on my watercoloring abilities. What do you think? You can click on this smaller up-close shot and it should show you all of my little flaws! ;) I'm still not quite sure what to do with the ground when I watercolor - I tried some variations on each of these cards. Stay tuned for "the story" on these cards and to see the variations I'm talking about, and have a great day!!!
Paper: Chocolate Chip and Old Olive CS, Old Olive Prints DSP, Watercolor Paper
Ink: Basic Black, Really Rust, Old Olive, Summer Sun, Pumpkin Pie, and Bordering Blue Classic Inks
Accessories: Aqua Painter, Old Olive Poly-Twill ribbon and Stylized Silver HPH Flower ribbon slide (both in 2008 Occasions Mini Catalog), corner rounder punch (with guide removed to make scallops)
June 8, 2008
Scrapbook Page for Sarah
 So, I promised myself I would scrap a couple of days ago and then we had all of that bad weather. I have a HUGE headache right now, but I got the page scrapped and thought that I would go ahead and post it. I cheated since most of my papers and other scrappin' necessities are in storage and used a kit I have on hand. I'm going to use the kit to make a chipboard book with, but I figured I should have some left-overs so I grabbed some of the card stock stickers out of it and some of the patterned paper and one piece of the River Rock textured card stock, and this is what I came up with!! Not to mention, there's TONS of stuff left in the kit - more than enough for my board book.
 All of these items come from the SU! Special Delivery Girl Simply Scrappin' Kit and I MADE the buttons with some Crystal Effects, patterned paper, and clear buttons. The little flower on the top right of the page is 2 stickers from the kit layered on each other and then on top of that one of the clear sticker "bubbles" from SU!'s build-a-brad kit.
This picture is of Sarah and as the journaling that you probably can't see says, she is 6 months old and it was in 2005. I LOVE this picture of her and I had it developed in sepia and happened to have it here with me in Oklahoma so I knew it was the one I wanted to scrap. I liked that I could add color to the page with little torn strips of paper, and cut paper and ribbon, and then it kind of frames the picture really making her cuteness pop. What I was disappointed in was the glue that I used was a special ribbon glue that "won't seep through your ribbon" but it most definitely did seep through the ribbon I sponged with Apricot Appeal, so those darker spots you see, just ignore - I'm crossing my fingers that they'll magically disappear because they're not part of the polka-dot pattern.
I would love to hear what you think!! In the next couple of days you will see this page again, but "edited" to have some paper piercing that I want to do on it after seeing it in this photo.
Paper: Special Delivery Girl Simply Scrappin' Kit
Ink: Apricot Appeal
Accessories: Clear Buttons, Soft Subtle Buttons, Crystal Effects, white polka-dot ribbon sponged Apricot, Groovy Guava double-stitched ribbon, stapler, sponge
June 6, 2008
Obviously...
I won't be stamping, at least not today or probably tomorrow. Altus Oklahoma was hit by one heck of a storm last night and we are still without power over 24 hours later. We put all of our food in coolers, but I lost a lot of meat that I had in the freezer.
The news says 4200 people are without power. How do I know this, without power? Because the northern section of town was in another dimension of time when the storm hit and managed to make it unscathed. So, we're in a hotel tonight because my baby has had an ear infection and a fever the past two days (hopefully the meds will kick in soon) and sleeping in a room with no A/C when it gets up to 104 degrees during the day and doesn't cool to anything below 70 degrees at night isn't too comfortable for a feverish child.
So, we're relaxing, went to the hotel pool, and I'm catching up on my blogs that I read. I thought I would just post one picture - the craziest one I took. This hotel was on the news program I saw that reported the above numbers and there WERE people in the 2nd story of the hotel that you don't see too much left of.
The local hospital reported to the news station that only one person went to the hospital with injuries from the storm and it was for a minor cut. 60 homes were damaged and 20 of them are going to be claimed as total losses. All this, and they don't even think it was an actual tornado!! Just a crazy storm that squashed some cars and houses. Everyone wishes they could say it was a tornado that destroyed their property. I feel sorry for them that it was just insane wind. Maybe we'll hear in a few days that it has been upgraded to a tornado or something.
Anyway, we are very lucky to not have had our cars damaged by one of the HUNDREDS of fallen trees or blowing debris, and our apartment complex is fine. We are all safe too and very thankful! We never heard any warning sirens and we were even outside in some of the craziness taking pictures because we didn't know just how severe it actually was since we couldn't hear the sirens. My DH doesn't know it, but after this he's getting a weather radio for Father's Day!!!
I'll post a card once I can get some stamping done.
Boot Loot Winner
Right now I am "borrowing" Internet from a hotel because we have had no power in our house since last night at about 8 pm. There was either a small tornado or very strong winds that left just about every single house (I'm not kidding) within at least a mile around us with a tree that was blown over, or cards that were smooshed, or roofs blown off. I will post pics when I get a chance later. Anyway, it's supposed to be at least 100 degrees today, so we're driving around trying to stay cool in the car. We were lucky and our cars are find and so is our apartment. If anybody out there has weather channel or has seen what happened here on the news, we would love to know. Without power we can't really find much out and we've got to leave this hotel parking lot as soon as I'm done with this post ;) Without further ado, I will finally get to the boot loot winner.
Eight of you had a heat gun burn as your initial answer, and random org picked.....

Sorry for the dorky pic of random org, but just in case you needed proof, there it is.
stampwithclara said...
Well a few others have guessed it but my first thought was getting burned by the tip of the heat gun. I can't wait to hear what it is!
You silly ladies...it HAS to be from a large eyelet!! You were working at your table or desk when you dropped an eyelet on the floor and since it was the last one of that color and you absolutely NEEDED it right at that moment, you got down on all 4's until your knees hurt, so you sat on your bum with both knees bent to the side and was searching and searching all over for the little piece of hardware to finish your card and when you finally stood up, there it was, stuck to your leg!! :D YA, that must be the answer!! LOL...at least that's what would've happened to ME!!
Boot Loot Time!!! This post will remain at the top - check below for new posts.
My blog counter hit 65,000 sometime this afternoon while I was stamping. I will show you that card in the next post.
Here are a couple of pictures of the items I'm going to give away in my Boot Loot. It consists of 12 sheets each of the SU! Designer Series Prints Paper in Bayou Blue, River Rock and Groovy Guava cut to 6 x 6 size (the paper is not cut yet in the picture). You get an assortment of the Die Cut blooms that are on Pumpkin Pie and Real Red textured CS. I've also included some beads and hat pins from the Paper Pretties kit, some SU! On Board chipboard stars and hearts, and lastly, this set from the last Sale-a-Bration called So Many Scallops. It is die-cut, new and unmounted.
I hope someone out there thinks this is a good Loot to try to get, so that we can have some fun with what you have to guess to win it. If no one guesses correctly I will use the random.org number generator to pick a winner. If there's a tie of only two people, the first one who commented will be heads, the other tails, and I'll just flip a coin. More than two people in a tie will be given a number 1 through however many there are in order of time/date of comment and I'll use the random.org number generator to pick the winner.
Picture of all of the goodies:
Close-up of the paper:
Close-up of the embellishments:
So, what do you have to guess? Leave a comment on this post and tell me what you think caused this ring on my leg: If you honestly can't make a guess, tell me something that makes you happy. It will be fun to see what you guys think did this!
You have until June 6th at 10:00 a.m. central time to guess and this post will remain at the top of my blog so make sure that you check below for new posts!!!!
June 4, 2008
Post for Tomorrow

 Stamps: Father Figure by Verve Visual
Stamps By Judith
 If you check out the website Stamps By Judith, you may be able to find the stamps used for this card. I bought them a couple of years ago, so I don't know if she still carries them. She has a list of stamps by numbers, and that's where I would look (I'll give you the numbers on the stamps I used). Anyway, I just wanted to make a fun little card where I created the scene, and try my hand at some more water coloring. My water coloring is a work in progress, so I would love to know what you think! The one thing I should have done is put the ground touching the very top-most toes of the chick instead of the bottom ones. He looks like he's tip-toeing :)
June 3, 2008
CC169 And The First Ink On My Verve Visual Stamps
 So, yesterday afternoon I got a fun package in the mail. It could have only been more fun if i didn't know it was coming! ;) I ordered four stamp sets from Verve Visual because I could resist no longer. It would have been five, but they were out of stock of the Petals & Stems set because I guess I was the last person that thought to order it.
 Stamps: Anniversary Birds and Great Expectations by Verve Visual