We get to go visit my husband's family in Mesa, AZ after all and I'm so excited! I'm excited partly for all of the shopping I can do there - they have real stores like Jo-Ann's, Michael's, Hobby Lobby, TARGET, etc.!!!!!! Mostly I'm excited because we get to see some family that we haven't seen in a while and my sister-in-law is going to make the trip as well with her family. They weren't going to at first, and then her husband surprised her with getting vacation time so that they could go. Anyway, happy Thanksgiving to all of you. I hope that you're able to take the time to enjoy all of the blessings you have, and can perhaps take the time to help someone else during this holiday season who is less fortunate. I won't be posting until around the 4th of December. I thought I would share a tutorial I found by Laura on her blog, which I view regularly (http://inkydinkydo.blogspot.com), that I think will be really helpful for those of you who want a gorgeous but easy Christmas gift to make. They're glitter ornaments, and her tutorial is outstanding. I've seen several, but she really takes the time to show you how to do it with pictures at each step, not just words. Enjoy, view her blog and tell her thanks, and take care everyone!!!
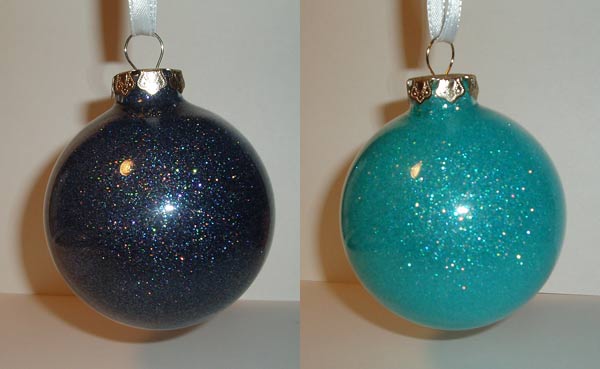
Ok here goes, my very first tutorial. I've never written one of these before, but I had so much fun making these ornaments, that I thought everyone should know how! The 1st one is Night of Navy and the 2nd one is Cool Caribbean. I also made one with Marigold Morning, but the picture made it look orange and not very pretty, but it's gorgeous IRL!

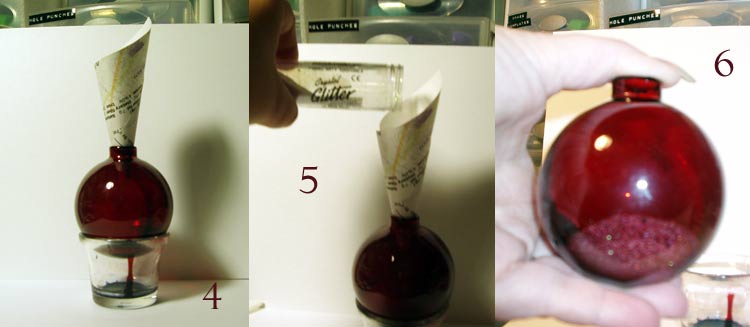
 Now you want to have a plastic baggie ready to catch the excess glitter. This is the bonus of this technique. You now have custom colored glitter you can use on other projects! (see pics 7 & 8) Let the ornament dry for a few minutes and replace the metal hanger. Your custom glitter ornament is done! These are so much fun and SO easy to make!
No comments:
Post a Comment
Thanks for taking the time to leave me a comment. I appreciate it and thank you for adding a little sunshine to my day.
Marie :)