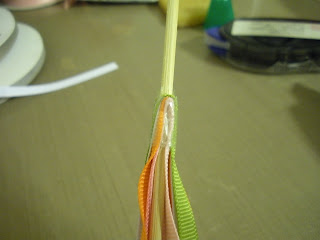
To put all of the ribbons on the wooden fruit skewer, I stacked them and used my trusty Crop-a-Dile to punch a hole through them all.
Next, I put the ribbons on the skewer just past the narrowest portion of the tip.
The 3rd step involved wrapping tape around the ribbons to hold them down so that the pieces would hang downwards.
The last step with the ribbons involved moving them down where I would want them. I figured this out by placing the "ball" I had constructed for the end over the top and making sure that they were just below it. I had the skewer just touch the top of the inside of the ball so that it would be stable.
The final steps for putting the ball on involved putting mini glue dots (sorry, I forgot to take a photo of this!) around the skewer just above the ribbons) on the wood and then sliding the ball on, gluing it shut and adhereing it to the mini glue dots to keep it in place and from flying off of the end.
To hide the taped ribbons, I tied a bow out of the Whisper White 5/8" Satin ribbon. Of course, your ribbon treatments could be entirely different. You could even use some of the ribbon that you can curl that goes on presents for a nice look as well.
PS - there is glitter on all 3 "sides" of the circles on every circle, so it sparkles quite a bit in real life. My girls love it! :)


This was so cute! I want to make one for my cousin's little girl I think she would love it!
ReplyDeleteMarie, what a great tutorial and sweet project you used it on. I can see why your little girls would love it! It's so princess! I don't have any little ones around, but I never know when a project like this may come in handy. TFS
ReplyDeletehow fun! thanks for showing us how!!!
ReplyDeleteThis wand is just so cute! I've shown it to some of my customers with little girls and they love it, too!
ReplyDeletehey girlie, I hope you are having a good week.....I am home this week and have more time to blog and create...just checkin in, I hope you have a new inspiration piece coming soon!
ReplyDeleteenjoy *~*